
WRITTEN BY: HARRIE PHILLIPS
PGCertClinEd, BAdVocEd (VocEd&Trng), DipVN (Surgical, ECC), DipBus, DipTAE (Development & Design), TAA
PUBLISHED: 7 MARCH 2018
REVIEWED/ UPDATED: 15 OCT 2025

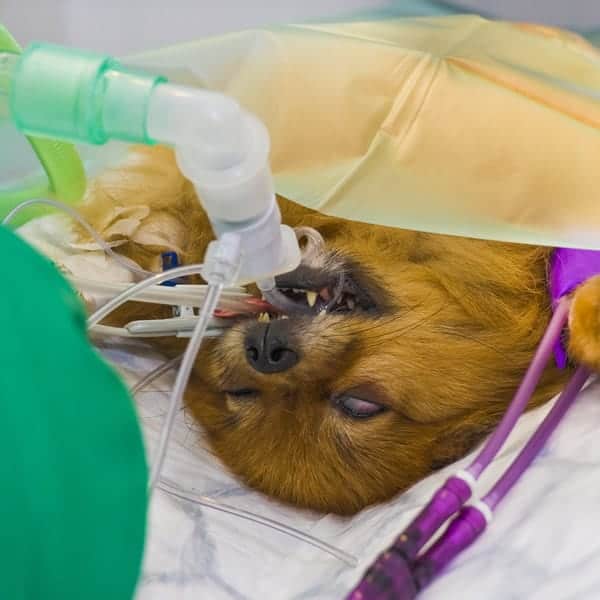
Depending on your clinic’s policies, you may be allowed to place endotracheal tubes. Securing airways for anaesthesia is best practice, however it can take some practice to get the knack of holding the laryngoscope, the ETT and the slippery tongue. Some species, like cats, are a little tricker than dogs.
Some clinics reserve ET intubation for vets, however the vast majority prefer their nurses understand how to perform the task safely. After all, securing that airway could be the difference between life and death for a patient one day. It’s not just anaesthesia that requires an ET tube to be placed.
It may seem to be a ‘simple’ procedure, especially once you do have the hang of juggling all of that saliva and equipment, but it’s not a benign one. Your placement and tube selection can negatively impact the patient. Getting it right is paramount.
Most clinics use single use only ET tubes, and reprocess to keep costs down for clients. These tubes are not manufactured to be reprocessed, so best practice is to charge out appropriately and dispose of after use.
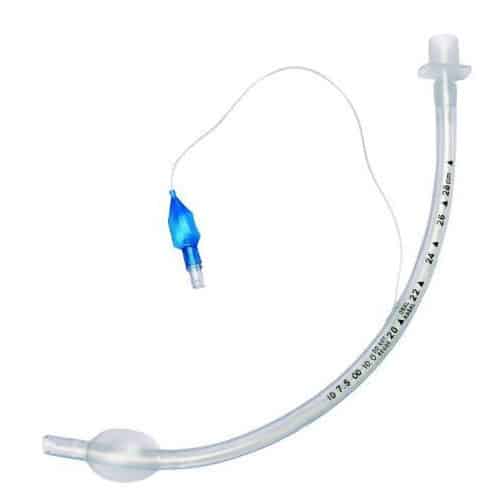
Endotracheal tubes are supplied in sizes that relate to the internal diameter, which is expressed in millimetres.
Commonly used tubes range from 3.0mm in very small cats up to 16.0mm in giant dogs.
Here’s some considerations for ENDOTRACHEAL INTUBATION FOR SMALL ANIMALS
1. Select the right size
For this, I mean diameter and length.
The diameter of the ET tube should be sufficient to almost seal the trachea without the cuff inflated; when the cuff is inflated a seal is formed.
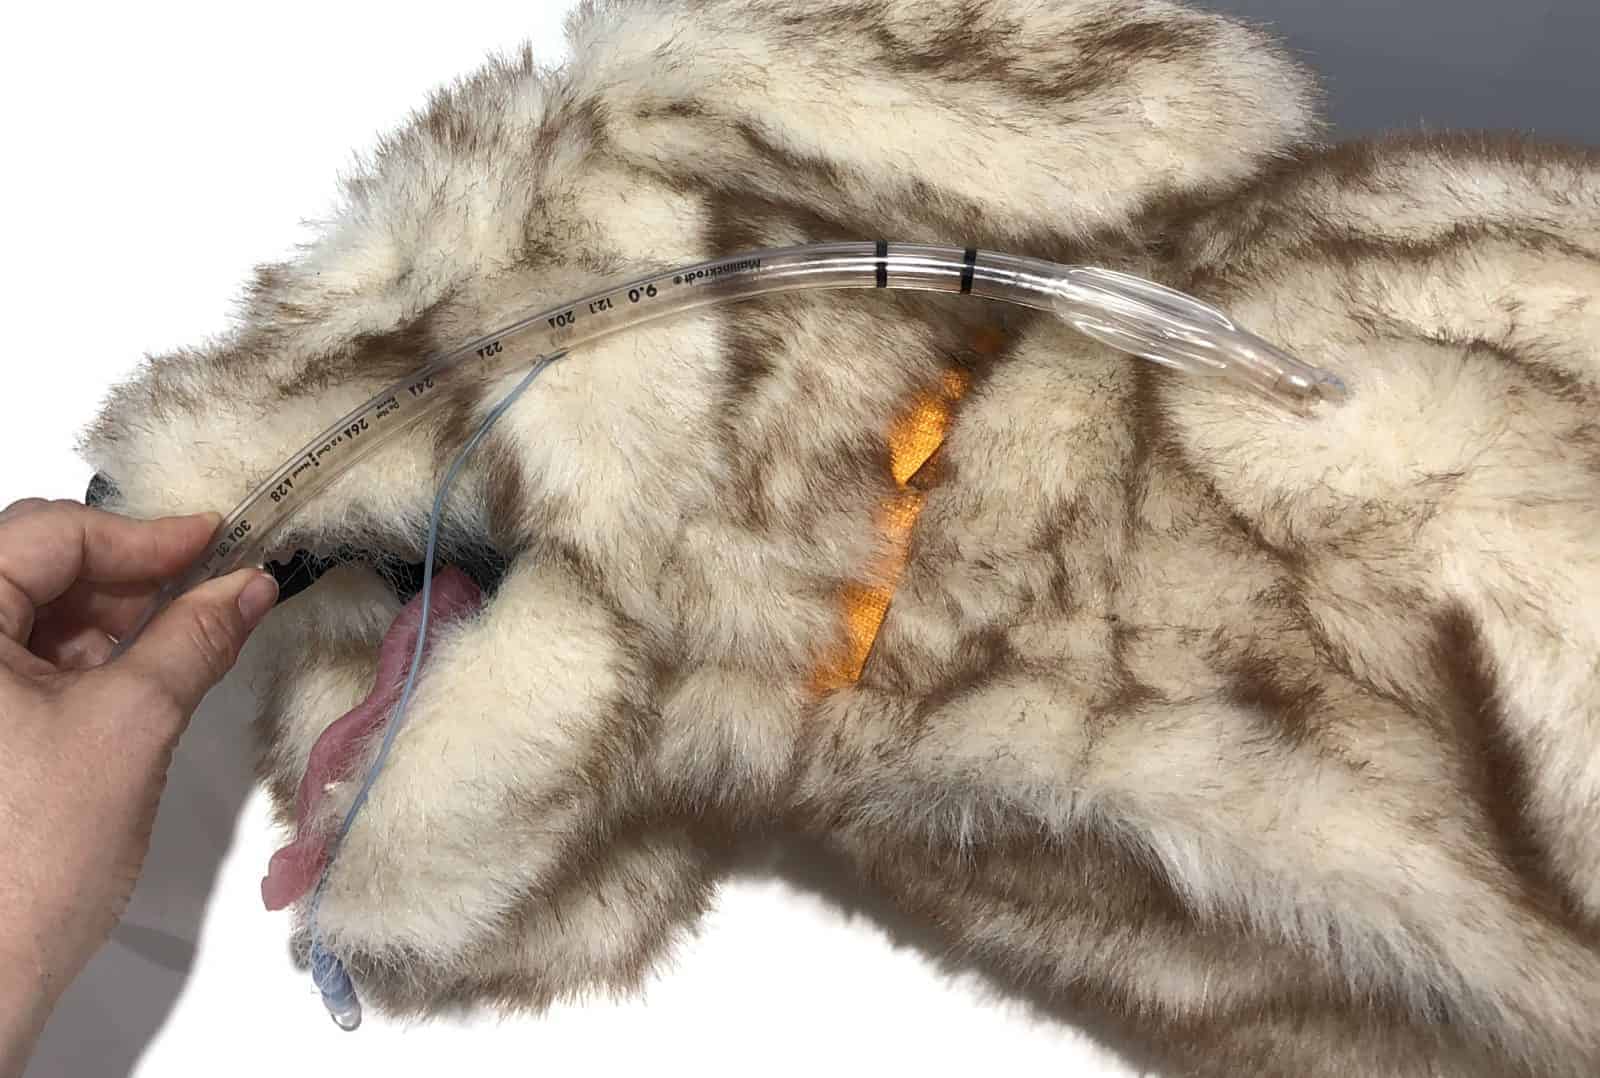
Lengthwise, we want the tube tip to sit cranial to (before) the bronchial bifurcation and the end to sit level with the canine teeth (so just inside the oral cavity). For most patients, this means cutting the tube. This prevents the ET tube from being inserted too far and into one bronchus, effectively cutting off oxygen to the other side of the lungs.
Even if we measure and tie off at the appropriate length – if the tube is too long, it will increase dead space. The more dead space there is, the harder it is for fresh gas flow to make it to where it’s important – the alveoli. This is where gas exchange takes place.
Measuring length
1. Place the patient into lateral recumbency.
2. Using an ET tube, measure the correct insertion length by placing it against the point of the scapula (top of the shoulder) as this is approximately just above the bronchial bifurcation, following the airway, and measure against the canine teeth. Most ET tubes will have measurements on them to facilitate this.
3. You can then secure the ET tube at the correct distance.
4. If there is too much tube past the canine, cut to length, ensuring you do not cut the cuff inflation line.
Measuring diameter
Relying on charts that give a particular size of ET tube based on an animal’s weight is very inaccurate. Different animal breeds have different trachea diameters so you should always have two or three sizes ready for use.
It can be useful to place the tip of an ET tube between the nares of the nose – this is often roughly the same size as the patient’s trachea and is a good way to gauge what size tubes to prepare. However, this is not 100% accurate and the final choice of tube size should be made once the glottis is visualised.
2. Test the cuff
Before you even consider intubation, you need to test the cuffs – even for brand new tubes.
Each tube should have the cuff fully inflated and left for 30 minutes. This enables you to see if there is a slow leak. Not all leaks are apparent with a quick inflate and squeeze.
If you use a reprocessed ETT, then also check for any contamination of the tube and cuff at this point. If any contamination is seen, pop back into the processing pile and select another tube.
There are commercial manometers which are designed to inflate and test the cuff viability. Most clinics will just fully inflate with a syringe.
Cuff inflation should also be checked every 30 mins of anaesthesia time. Not only could the cuff slowly deflate, but the tracheal diameter can change under GA due to the relaxation of the muscles.
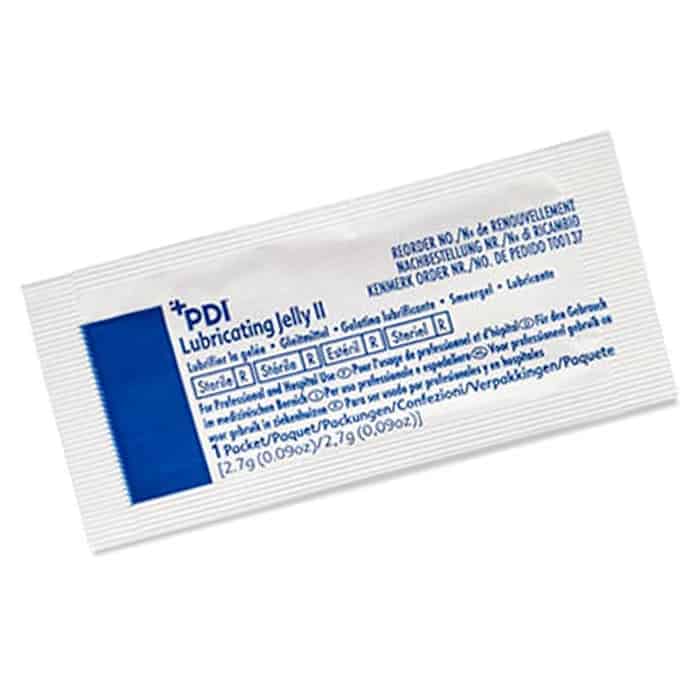
3. Lubricate the cuff
The cuff should always be lubricated with a water-soluble lubricant prior to use. This not only helps facilitate intubation, it also reduces trauma to the tissues and allows a better cuff seal.
For infection control purposes, it’s recommended you use a sterile lubricant in a sachet, rather than a communal non-sterile lubricant. These can breed bacteria.
4. Anaesthetic Depth
Your patient must have reached a suitable depth of anaesthesia before you intubate, usually when they have lost the gag reflex to ensure an atraumatic intubation.
The patient should be in sternal recumbency (although some prefer lateral), and the assistant should hold the upper jaw by the lateral aspect of the mucosa. The neck should be extended and supported by holding the base of the skull and not by holding the scruff. Holding the scruff can distort the airway, making intubation harder. For some patients, extending the neck is contraindicated (cervical disease, etc). The head and neck should be held in a straight-line orientation, not twisted.
Use of a laryngoscope can be helpful to visualise the epiglottis, especially when you’re learning.
Experienced clinicians will often intubate unaided. Never push the epiglottis down with the laryngoscope, instead depress the base of the tongue and the epiglottis will automatically come down.
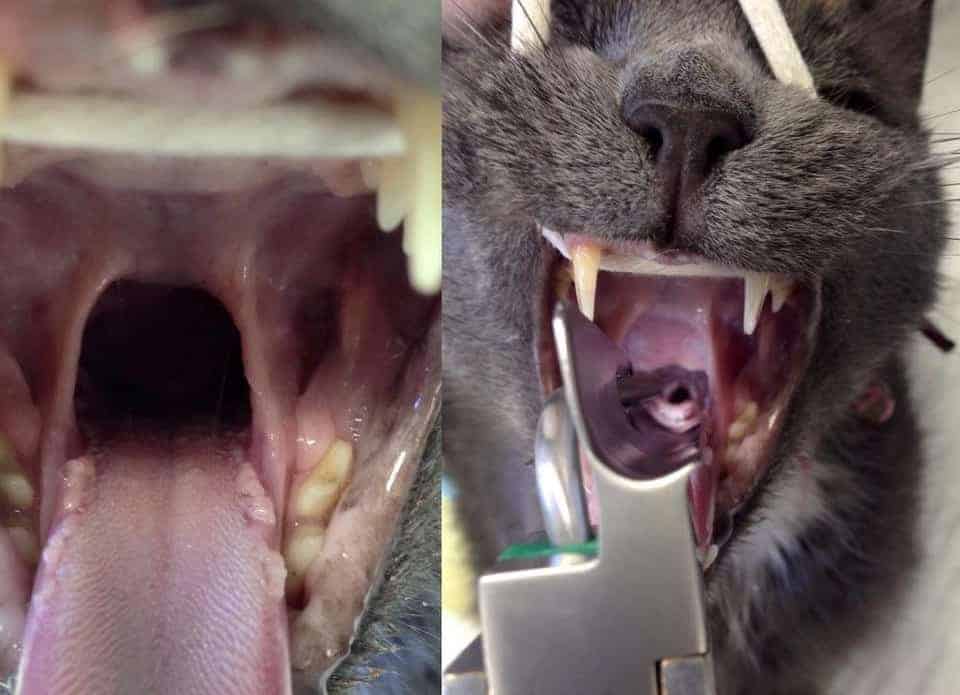
When intubating cats, you should always apply a topical local anaesthetic to the larynx to help reduce the chance of laryngeal spasm. Ensure you wait one minute for it to take effect, before trying to intubate. If laryngeal spasm occurs, this is an emergency as the patient will be unable to open the larynx and breathe! Alert the vet immediately.
5. Secure the tube
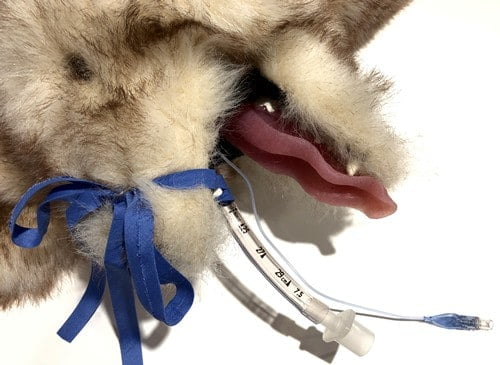
Securing the ET tube to minimise movement is essential. This is achieved by placing a ‘tie’ around the body of the ET tube, being careful not to obstruct the cuff inflation tube, and then securing it to the patient. When securing it to a dolichocephalic or mesocephalic patient, you will generally tie the ‘tie’ on the ET tube at the canine tooth, behind the canines up over the patient’s nose. Do not tie this too tightly, as you can cause oedema from restricting the returning blood flow.
In cats and brachycephalic breeds, you will need to tie at the back of the mouth (not the canines), and then pass the tie ends around behind the head. It is essential that you tie towards the back of the mouth, as if you tie towards the canines or front, you can accidentally push the tube in further.
Do not use an elastic based tie, as this is more likely to restrict venous return in the nose – it is too easy to pull too tight! Use a non-elastic tie such as binding tape (or ‘bias’ tape; from sewing stores), lengths of fluid administration tubing, shoe laces or commercially bought ET tube ties.
6. Connect your patient to the anaesthetic machine
Once the ET tube is inserted and secured, you can then hook the patient up to the anaesthetic circuit and turn the oxygen flow on. DO NOT TURN ON INHALANT AT THIS STAGE as the circuit is not yet sealed. Staff breathing in inhalant gases is a WHS concern.
Turn the oxygen flow onto a temporarily higher rate (e.g. 2 to 4L/min) and give two sigh breaths to open up the smaller airways. Turn the flow rate down to the calculated rate.
You can then inflate the cuff.
7. Inflate the cuff to form a seal
When inflating the cuff with a syringe, just ‘feeling’ the cuff inflation valve pillow (technically called the pilot balloon) does not give you an accurate representation of the cuff pressure – there is no correlation between the two!
There is also no set amount of air to be inserted into the cuff, so forget any formulas you have learnt. Several studies have demonstrated that the majority of cuffs are overinflated, and this can lead to tracheal irritation, tracheal wall ischemia/ necrosis, and tracheal wall tears. Roughly 10% of cuffs are under-inflated, and this can lead to pulmonary aspiration as well as leaking anaesthetic gases 1.
The volume necessary to inflate and seal a cuff is different for every patient, cuff and tube. The necessary volume depends on the external diameter of the tube, the internal diameter of the trachea and the size and type of cuff. However, no matter the size of the ETT, cuff pressure should be maintained within a range of 20-30 cmH2O.
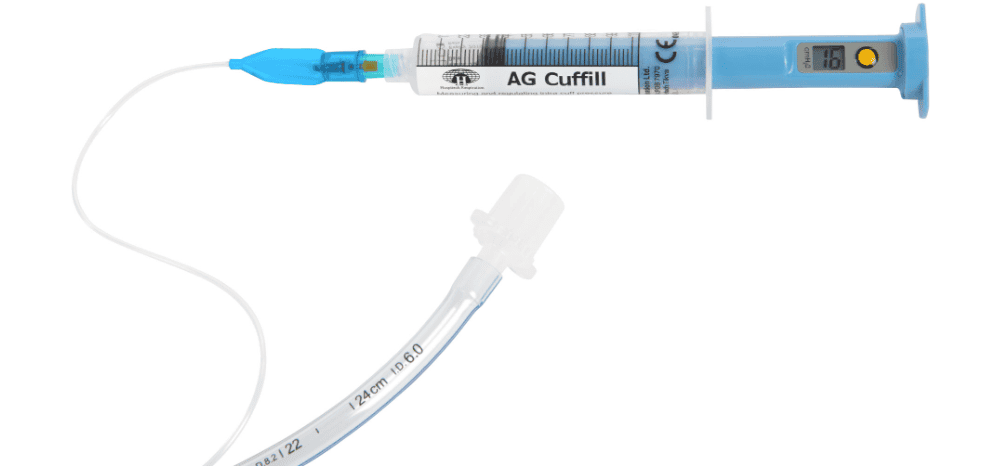
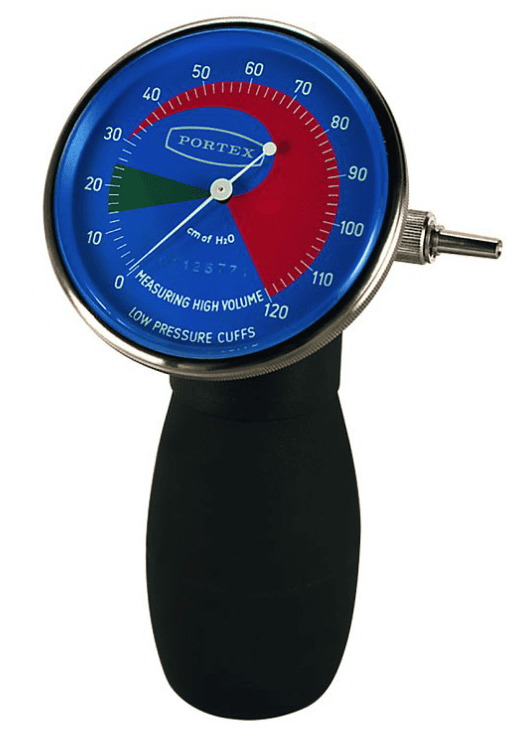
To inflate the cuff we should be ideally using a cuff pressure gauge that connects to the pilot balloon. This will tell us how much air to use to achieve a pressure somewhere in the 20-30 cmH2O range. Some of the commercially available devices include the AG Cuffill Syringe and the Portex Cuff inflator/ pressure gauge. Both perform equally well 2.
The AG Cuffill Syringe connects to the pilot balloon and gives a digital reading of the pressure. While very easy to use and quite portable, it is limited to 100 uses per syringe.
The Portex Cuff inflator/ pressure gauge connects to the pilot balloon and allows you to inflate the cuff while giving a direct reading of the the cuff pressure. It uses an analog face with the ideal pressure zone marked in green. While it is a bit bulkier than the AG Cuffill Syringe, it has not got limited uses.
When no pressure gauge device is available, a less accurate method called the ‘minimum occlusive volume’ technique can be used. This method has shown to have the greatest tendency towards overinflation, and along with the palpation method, rarely if ever achieves an optimal cuff pressure 3. To inflate the cuff using this method:
1. Ask an assistant to close the pop-off valve (or occlude the scavenger end of a non-rebreathing circuit without a pop-off valve).
2. Ask the assistant to give a breath. The assistant should count to three so you know when the breath is given.
3. As the breath is given (pressure should be no more than 18-20 cmH2O), slowly inflate the cuff until no gas can be heard escaping (you will need to put your head near the mouth).
4. Now you can turn on the inhalant, as the circuit is sealed and the waste gases will go out the scavenger.
References
1. Hung, W-C, Ko, JC, Weil, AB & Weng, H-Y 2020, ‘Evaluation of Endotracheal Tube Cuff Pressure and the Use of Three Cuff Inflation Syringe Devices in Dogs’, Frontiers of Veterinary Science, vol.7, no.39
2. Vijayakumar, V, Singla, B, Shetti, AN 2022, ‘To study the efficacy of AG CUFFILL (Digital) compared to that of standard PORTEX cuff inflator/pressure analog gauge for the measurement of endotracheal tube cuff pressure’, Int J Pharm Chem Anal, vol. 9, no. 2, pp.105-108.
3. White, DM, Makara, M, & Martinez-Taboada, F 2020, ‘Comparison of four inflation techniques on endotracheal tube cuff pressure using a feline airway simulator’, Journal of feline medicine and surgery, vol. 22, no. 7, pp.641–647.
want to learn more?
ANAESTHESIA & SURGICAL ANALGESIA
SHORT COURSE
This course introduces students to the foundations of anaesthesia – how to set up and test the equipment, what circuits to pick and when, calculations, and other factors that can influence how stable our anaesthetics are. You’ll also learn how the drugs we use affect the body, patient warming techniques and important and why premedication is necessary. We also explore analgesia specific for surgical patients.
Check it out